Overview
This plugin is needed to help support the use of the Triumph
CDN. An active subscription to the Triumph CDN is required for its use. You can
find out more about the Triumph CDN at: https://www.triumph.tech/cdn.
To maximize the impact of the Triumph CDN, we also highly
recommend acquiring the Triumph Web Agility plugin. How this plugin is used
with the CDN is discussed more below.
Implementing a CDN
Caching using a CDN is an incredibly powerful tool that yields
huge performance benefits, saves bandwidth, reduces server traffic, etc., but only
if it’s done right. When incorrectly configured, you lose not only the benefits
but it can also provide a ton of grief, as the incorrect data can be served to
the wrong person at the wrong time. Stepping into the world of CDNs does
require a degree of technical understanding and know-how that may not be for
everyone.
Activating a CDN to cover your web application is an easy
task. Once activated, though, you’re by no means done. CDNs have no inherent
knowledge of your application and don’t know what needs to be cached and what
should not be cached. It’s up to you to help it understand what you’d like it
to cache for you. To do this, there are two basic principles you need to
understand:
- Cache Control Headers - You tell the CDN what you’d like to cache using Cache Control Headers. Rock provides several different ways to configure these headers. There’s a whole section below on how to tune these headers for your site.
- URL Specificity – When looking at an HTTP request, the CDN treats the full URL (including query string parameters) as a unique cacheable item. That means the two requests below, though they represent the same page, will be treated by the CDN as two different resources:
https://rock.rocksolidchurchdemo.com/group-detail?GroupId=12
https://rock.rocksolidchurchdemo.com/group-detail?GroupId=13
This makes sense for the case above and is exactly what you’d want. The content for group id 12 will be much different than that of 13. Now consider this example of an API request:
https://api.rocksolidchurchdemo.com/api/People/GetCurrentPerson
Note that this API endpoint gets the current person by looking at the authentication cookie embedded in the request. The URL, however, will be the same for all individuals calling the endpoint. In this case, you’ll need to explicitly tell the CDN to never cache this request (more on how to do that below).
With these basic concepts in place, let’s start our journey into the tuning of a CDN for use by Rock.
Plugin Configuration
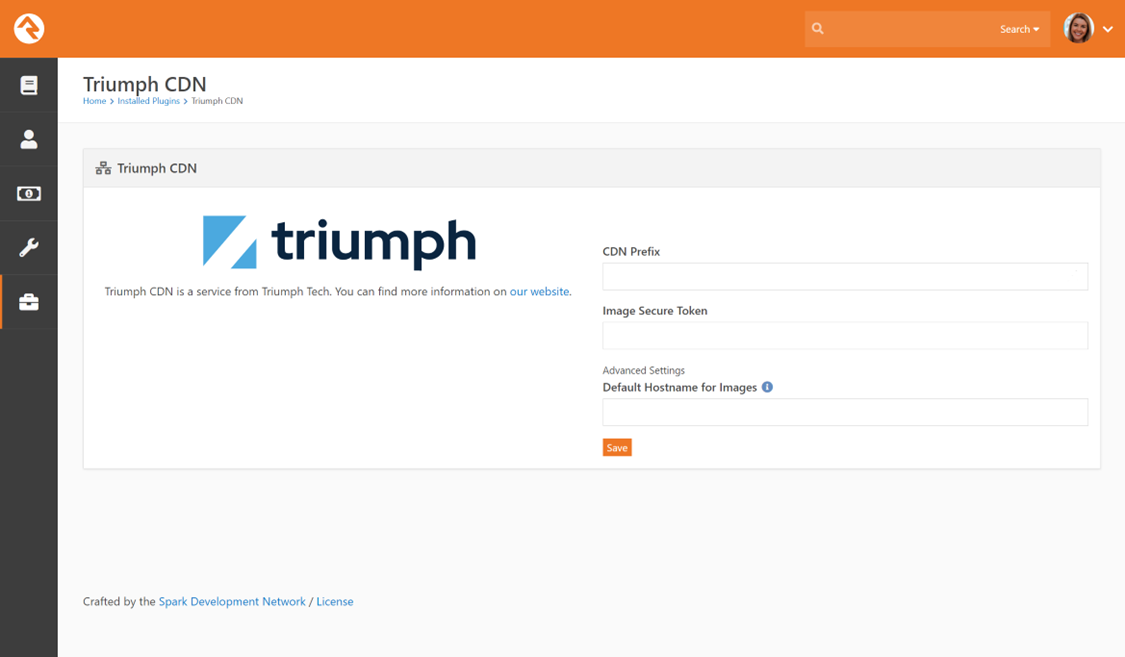
Once the plugin is installed, you’ll need to add the CDN
configuration values. These will be provided to you after the CDN is configured
by Triumph Tech. The configuration block can be found under ‘Admin Tools >
Installed Plugins > Triumph CDN’.
Tuning Your CDN
Now we’re ready to start tuning the Triumph CDN for your
Rock instance. The needs of every organization will be different, so we’ll
focus on all of the areas in Rock that allow you to configure cache control
information.
Understanding Cache Control Headers
Before we jump into the configuring of Rock, let’s spend a
moment looking at the cache control response header. As we mentioned above it’s
this header that communicates to the outside world how the content of the
request should be cached. The two main parties that would cache the content are
the client’s web browser and a CDN (or similar proxy).
The standard response header key for caching is ‘Cache-Control’.
The value of this header has several options.
- Public – This tells the world that anyone is allowed to cache the content.
- Private – This tells the world that the content is user specific and can only be cached by the browser.
- No-Cache – Despite what the name says, the content with this tag is cacheable, but the request must be confirmed with the origin server (Rock) to ensure that it hasn’t been updated (usually using an ETag).
- No-Store – This is the definitive way of saying ‘don’t cache this’.
The Public and Private options have some additional
configuration to tell the CDN how long to cache the content. This is called the
‘Max-Age’. This is expressed in the number of seconds.
Note that the Public option actually has two different
Max-Age settings. These are:
- Max-Age – The expiration for local caches (typically browsers).
- Public Max-Age – The expiration for network based caching like CDNs and proxy servers.
Static Content
Static content is served directly from your Rock web server.
Rock as an application does not play any part in the serving of this content.
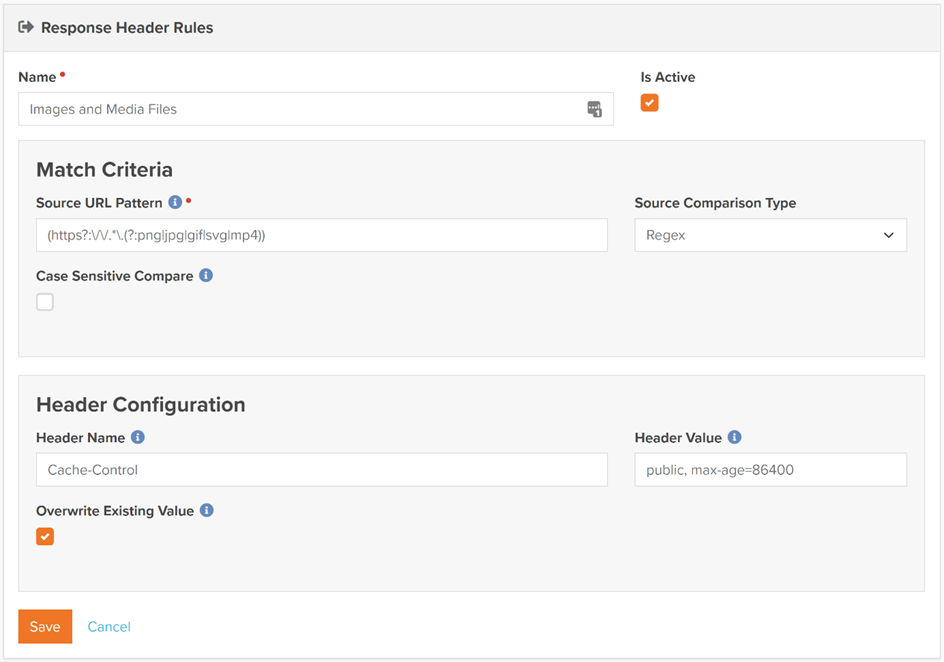
To provide direction to the CDN, you’ll need to add HTTP headers to the
response headers of requests that come from your site. This is easy to do using
the Triumph Web Agility plugin. Simply create a ‘Response Header Rule’ similar
to the one below.
Note
Rock does add cache control headers for some static file types directly. This includes CSS and JavaScript files. These automatically get a cache control set to cache for one year. These files are fingerprinted so that changes to the files generate a unique URL to ‘break’ the cache.
File Types
Now that we have the static images configured, let’s look to
see how we can do the same with images that are managed inside of Rock. As you know
images and documents stored in Rock are configured as File Types. These types
allow you to determine where the files will be stored and the security required
to view them. The file types can also set the cache headers for the CDN.
Configuring the caching for file types is found under ‘Admin
Tools > General Settings > File Types’. Select the file type you’d like
to configure and adjust the cache control header settings.

Warning
Be sure not to setup caching for files with security enabled. This will prevent these files from being publicly accessible (though not discoverable) on the CDN network.
API Endpoints
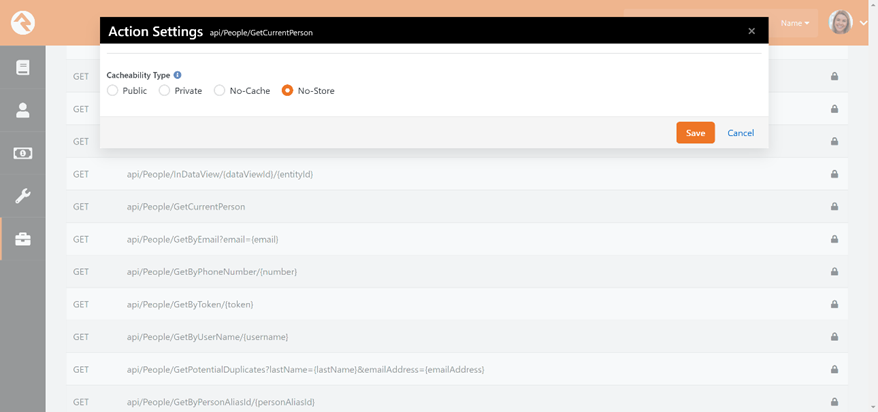
You can also cache the results of Rock API endpoints. Cache
control settings are enabled on a REST action level. You can configure this
under ‘Admin Tools > Security > REST Controllers’. Select the controller,
then the action you want to configure. The modal will allow you to select the
cache control setting.
Rock Page
You can also select to cache an entire Rock page. This
should be done with great care, though; if the page has any personalized
content it will be cached and sent to all requests after the initial load. This
feature can, however, be very powerful.
There may be situations where a page on your website experiences
a surge in traffic. For example, a page that provides weather closure
information or field statuses on a rainy day. Setting up a page without any
personalized content and configuring it to be cached by the CDN can protect
your Rock server from being overwhelmed by requests. Note that in these cases
you can still update the page’s content. Simply provide a very short cache
duration like 1-2 minutes. A short cache duration of even a minute will drastically
reduce the number of requests hitting your server in a surge.
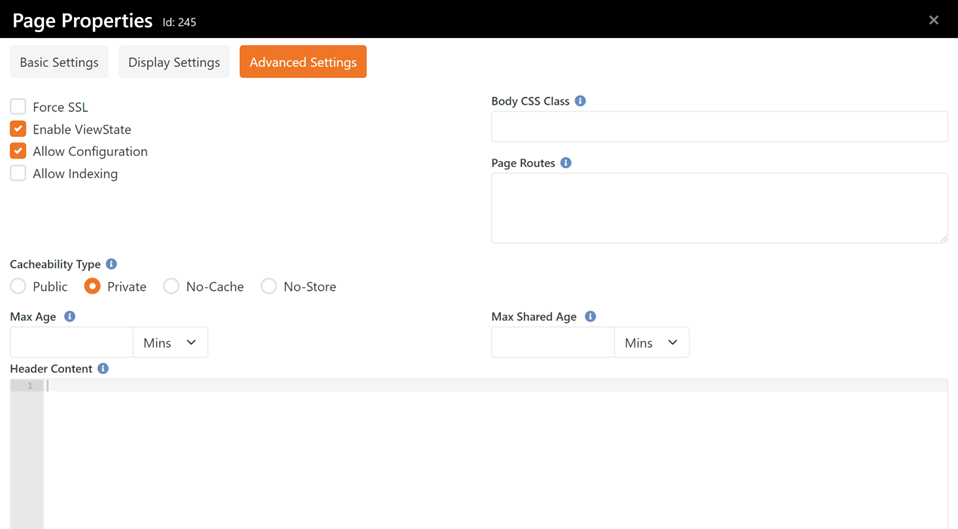
You can set the cache control settings on a page by going to
the ‘Page Properties’ dialog on the page and clicking on the ‘Advanced
Settings’ tab.
Confirming Your CDN Setup
With everything set, you’ll now want to confirm the CDN is
caching as you intended. Checking your work can be a little difficult and
requires knowledge of browser developer tools. Let’s get started with our test.
(The instructions below are specific to Chrome on a PC.)
- First load the page or resource you’d like to check in your browser.
- Enable your browser’s developer tools by right-clicking on the page and selecting ‘Inspect’.
- Open the developer tools ‘Network’ tab. This will initially be blank.
- Reload the page or resource in your browser. The information will load into the ‘Network’ tab.
- Find the specific resource on the file list and look at the ‘Response Headers’ section. Here you’ll see the ‘Cache-Control’ header and its value. Confirm that this value is what you expected it to be.
- Next, you’ll want to see if the content was delivered from the CDN’s cache or if it was loaded from your Rock server. This is displayed in the ‘X-Cache’ header. A value of HIT means the content came from the CDN, while a MISS or TCP_MISS means it was sourced from your Rock server.
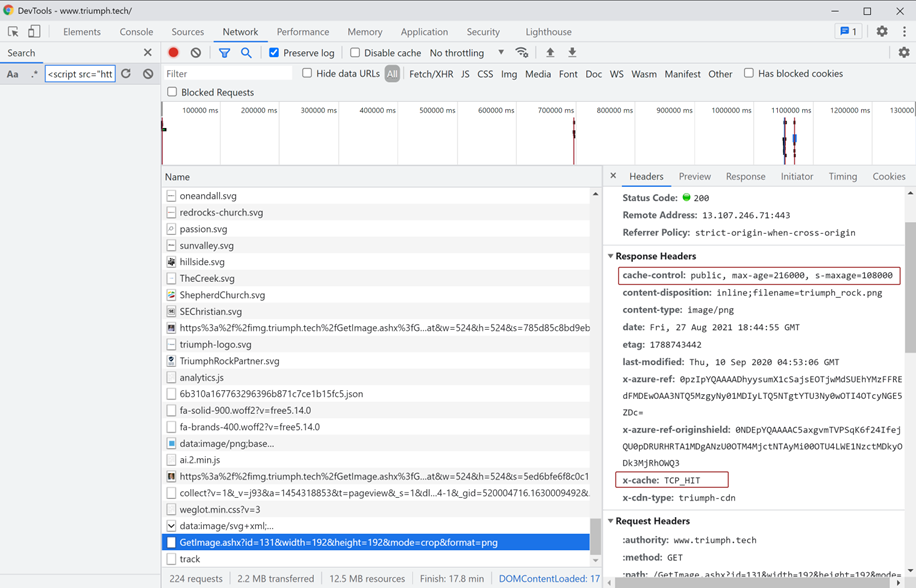
Here’s where things can get a little confusing. Oftentimes you’ll see a MISS when you would want or expect to see a HIT. The first time content is requested, the CDN will have to source it from the Rock server. This will be counted as a MISS. After reloading the page, though, you may see it still say MISS, which is very confusing. This is because your browser has actually cached the file, and that cache includes the original HTTP headers. To ensure you’re getting the right view, right-click on the file on the network tab and select ‘Clear browser cache’, then reload the page again.
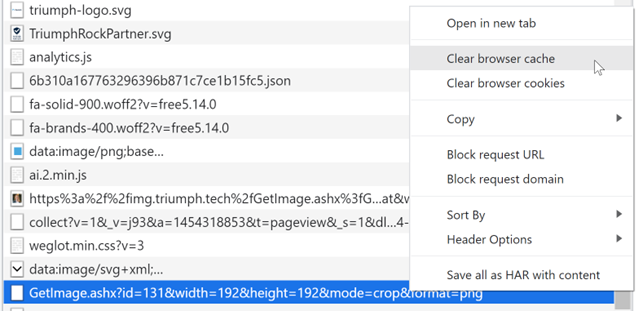
An alternate solution to the
invalidation problem is to test the request in a different browser, such as Edge,
Firefox or Safari.
Image Optimization
Triumph’s solution goes beyond the typical CDN to provide
world-class image optimization, including these features:
- Image Resize & Crop - This allows you to customize the size of the source images on your site. You can choose to square some images as thumbnails for certain pages and show the full image for others.
- Compression - The Triumph CDN can automatically compress your images using best-practice algorithms.
- Auto Format Selection - Triumph’s CDN will auto select the best image format for each request by looking at the request’s browser and platform. Some individuals may receive a JPG and others a WebP file, depending on what’s optimal for their individual request.
- Image Modification - On top of optimization, the Triumph CDN can also apply hundreds of modifications to your images. Some examples of these modifications include blur, monochrome, duotones, noise reduction, masks, rotation, face detection, and many, many more.
Triumph’s Image Optimization feature is based on the popular imgix web service. No extra configuration
or knowledge of imgix is needed. To apply optimization to an image on your
website, simply use a new Lava filter as shown below.
<img src="{{ '/content/sample.jpg' | TriumphImgCdn:'auto=compress&auto=format' }}">
You can find more information on the capabilities of imgix by
visiting their documentation
site (https://docs.imgix.com/apis/rendering) or playing in
their image sandbox (https://sandbox.imgix.com/create).